Custom Domain Configuration
This step-by-step guide will walk you through setting up a custom domain in the Goxy Dashboard. This allows you and your players to connect to the server using your own verified domain. Ready to give your network a professional look with your own domain?
Set up a custom domain in minutes and make your network stand out with a unique address!
Before You Begin
This guide shows how to configure a domain in Goxy so you and your players can use it to connect. Before starting, understand the different methods. This guide focuses on one of them.
Minecraft has a special mechanism that minimizes configuration errors that could affect other services (e.g., website or TS3 server). It's supported by most players, but in rare cases, some may experience issues (then consider adding a CNAME record).
Your domain (e.g., mc.goxy.io) will be redirected to our address (e.g., xxx.gxy.pl). Players enter mc.goxy.io, and it's automatically translated to ours.
This method is more reliable but prevents hosting a website or other services under the same address.
You can point your domain to our IP addresses. We don't recommend this, as you'll need to manually update it every time we change IPs.
Instead, use a CNAME record for a similar effect without manual IP updates.
Coming soon.
Configuration
- Cloudflare
- OVH
- Select your domain in the Cloudflare Dashboard.
- Go to the
DNStab on the left menu. - In the
DNS Managementsection, click the blueAdd Recordbutton on the right. - A form with additional fields will expand.
- In the Type field, select
SRV. - In the Name field, enter:
_minecraft._tcp. - In the Priority field, enter:
1. - In the Weight field, enter:
1. - In the Port field, enter:
25565. - In the Target field, enter:
Your network subdomain(found in the Domains tab - ends with.gxy.pl). - Click the
Savebutton.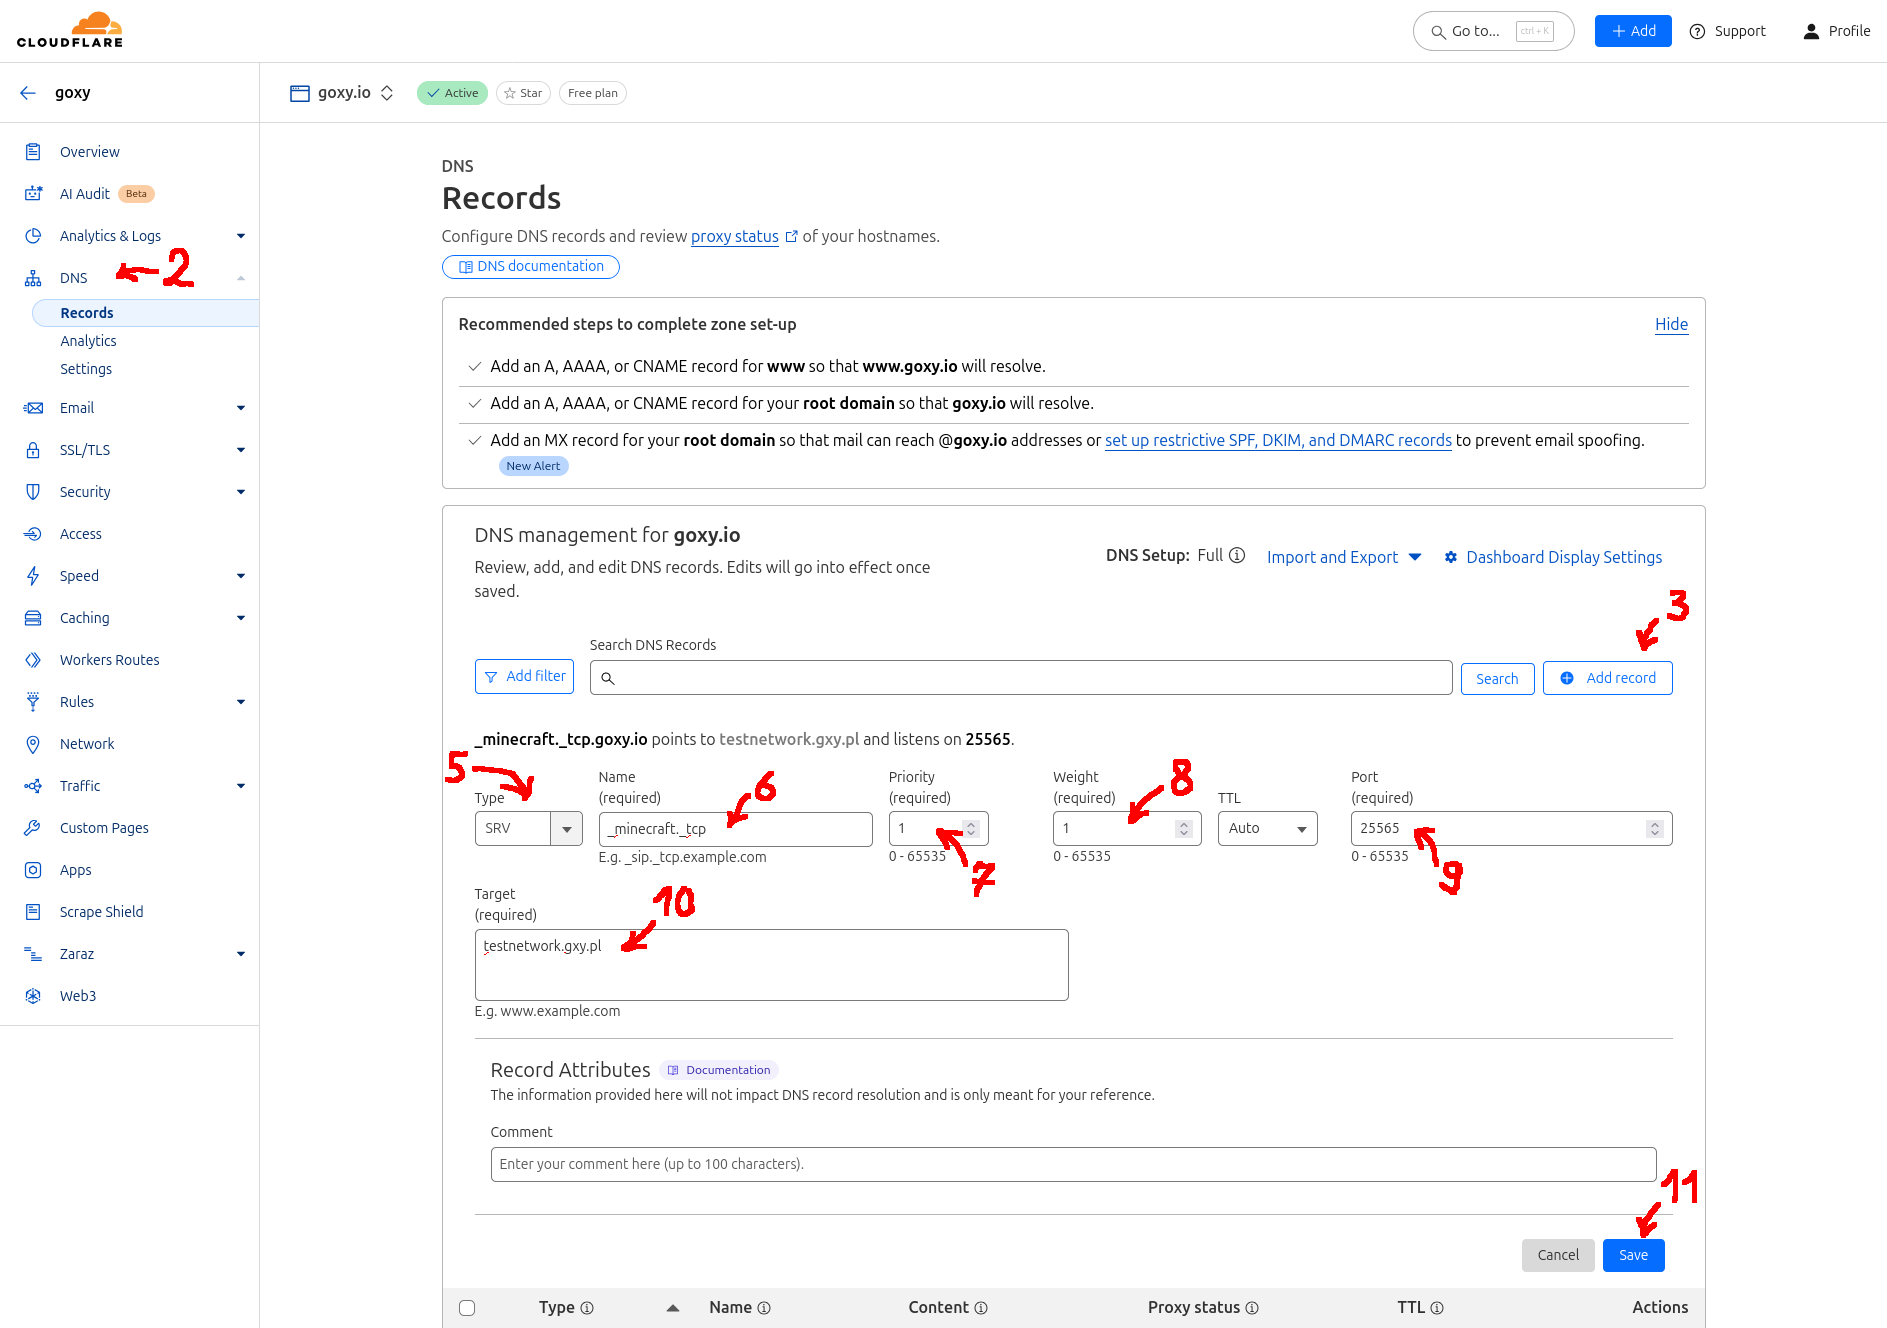
- Wait up to 10 minutes for DNS servers to refresh. After this time, try joining the server in-game using your domain. In some cases, even if configured correctly, DNS propagation may take up to 24 hours.
DNS server refresh can take up to 24 hours. If the server doesn't work immediately, check again after a few hours.
OVH instructions coming soon. Use the Cloudflare guide as a reference or contact us on Discord if you have questions!
My Domain Provider Isn't Listed
If your provider isn't here, follow the same logic as other sections. DNS record configuration is similar across most dashboards.
Some providers don't allow DNS record management for purchased domains. In such cases, we can't assist - adding records is essential and unavoidable. Contact your provider's technical support.
🌟 Professional Look
A custom domain makes your network look more professional.
🎮 Easy Joining
Players can use a simple address like mc.goxy.io instead of the Goxy subdomain.
⚙️ Flexibility
Choose the configuration method (SRV, CNAME) that best fits your needs.
Links
Contact us!
We respond to all messages within 24 hours on Discord.
🎉 Set Up Your Domain & Stand Out!
Join Goxy and give your network a professional identity!
REGISTER FOR FREE