Network First Setup
This step-by-step tutorial will guide you through the process of creating and configuring your own server network in the Proxy-as-a-Service dashboard. With it, you will easily launch your servers and start building your community.
Before You Get Started
Do you prefer the video form?
In cooperation with the Youtuber, we have also prepared for you a video tutorial that visually shows the whole process:
Do you have questions or encounter problems?
Don't hesitate to contact our support team! We are here to help you. You can find methods of contacting us here.
Steps
Step 1: Logging into the Goxy Dashboard
In order to use Goxy, you must have an account in our dashboard. If you don't have an account yet, please proceed to registration.
After logging in, you will see this view:
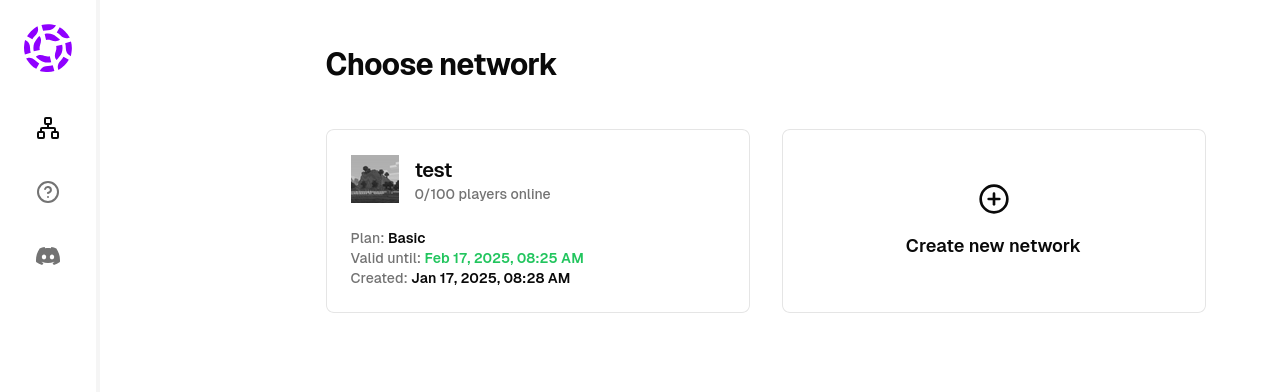
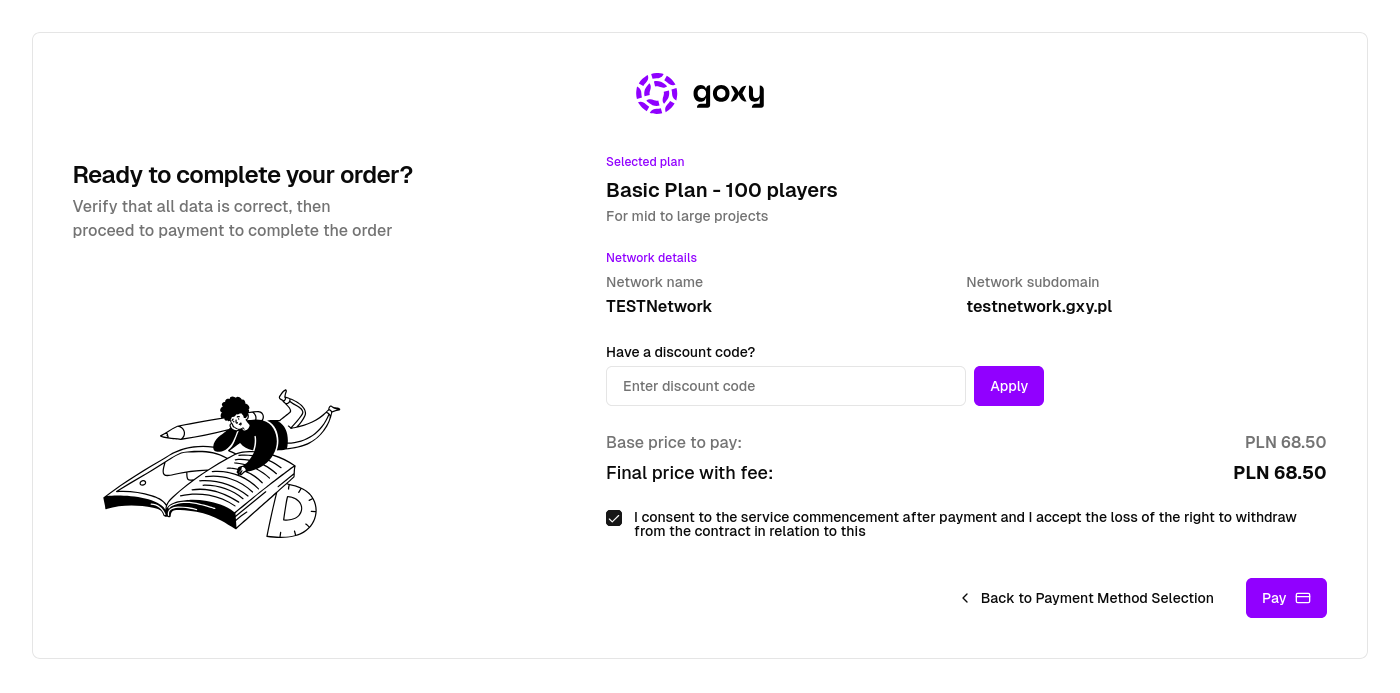
Step 2: Creation of a New Network
A network is a collection of multiple servers in our proxy, which from the player's perspective form a single server. However, the logical connections between servers allow you to experience unique gameplay. The player doesn't even know that he is being switched between different servers - to the player it looks as if he is switching between different maps.
Network in Goxy can be either a single server to play with friends or a large server with 10,000 online players. Thanks to its unique approach, we makes it easy to scale game servers.
To create a network, perform:
- Press the
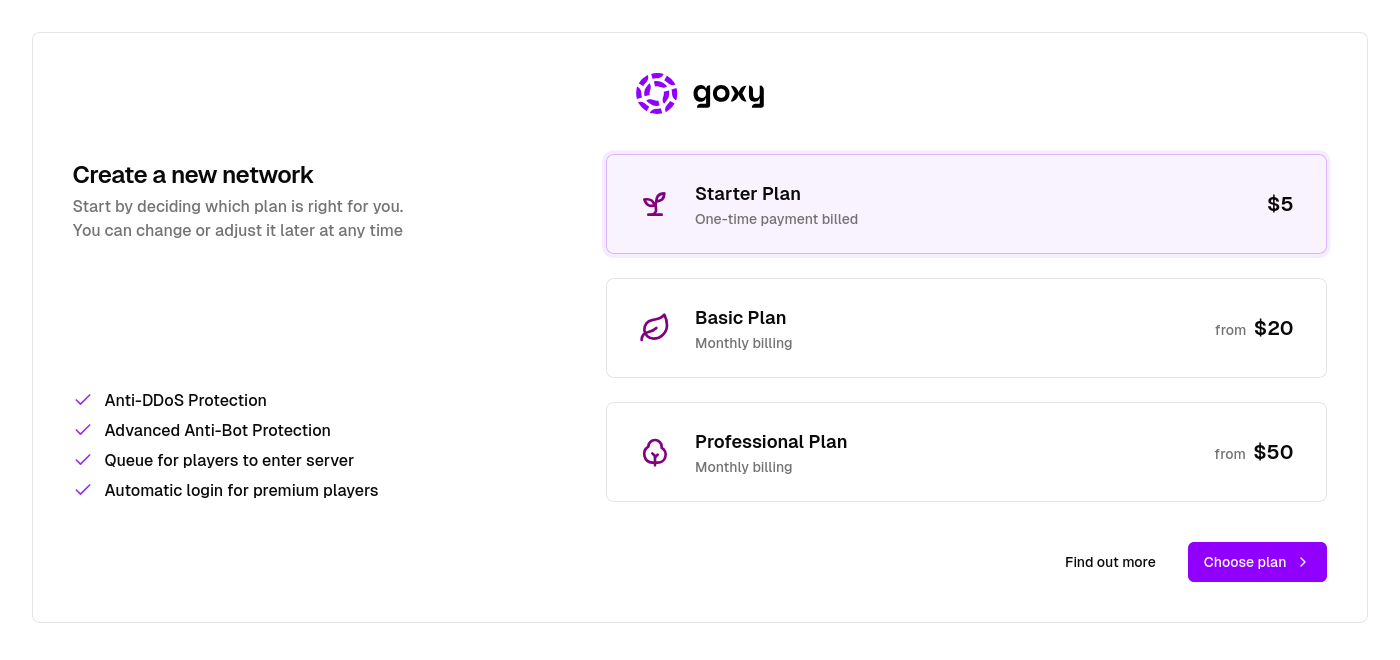
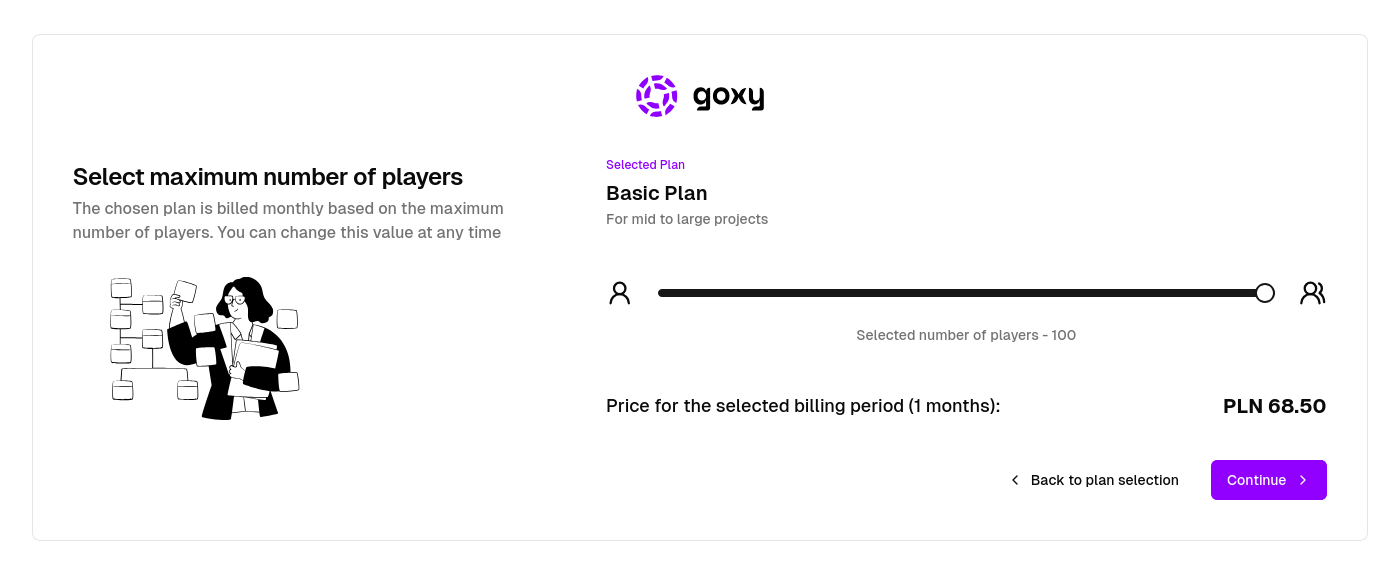
Create New Networkbutton in the list of available networks. - Select the plan, plan duration, maximum number of online players.
- Enter the server name and define the server subdomain.
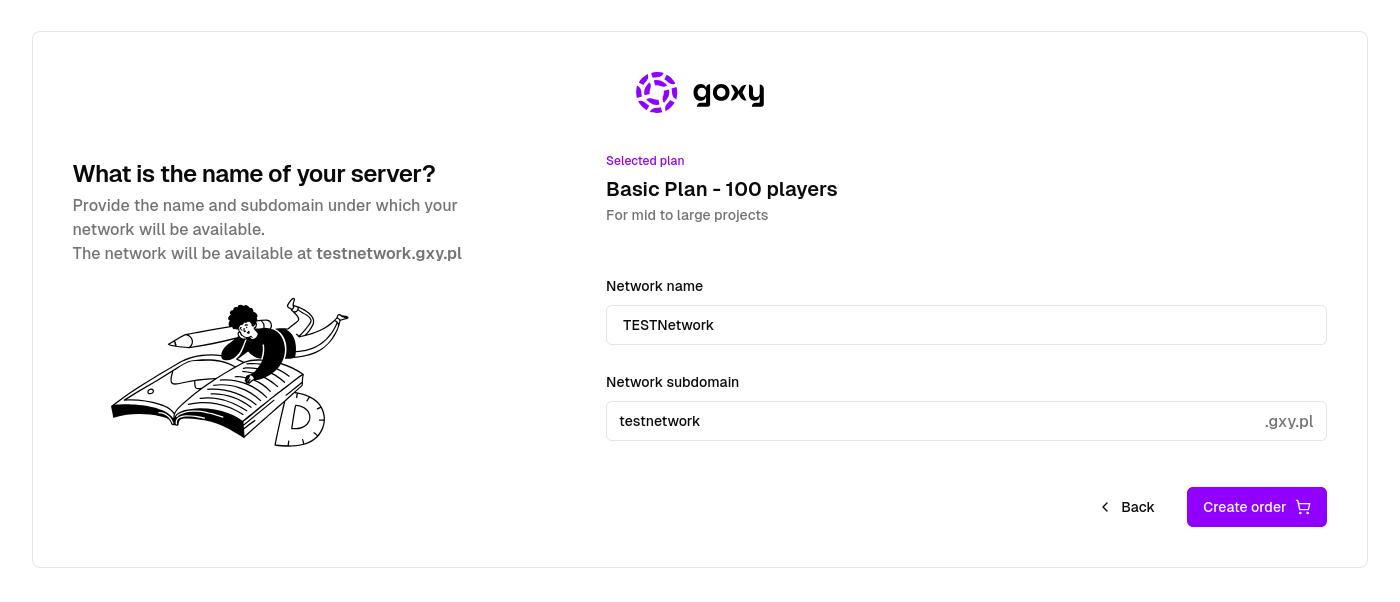
- Pay and enjoy Goxy!
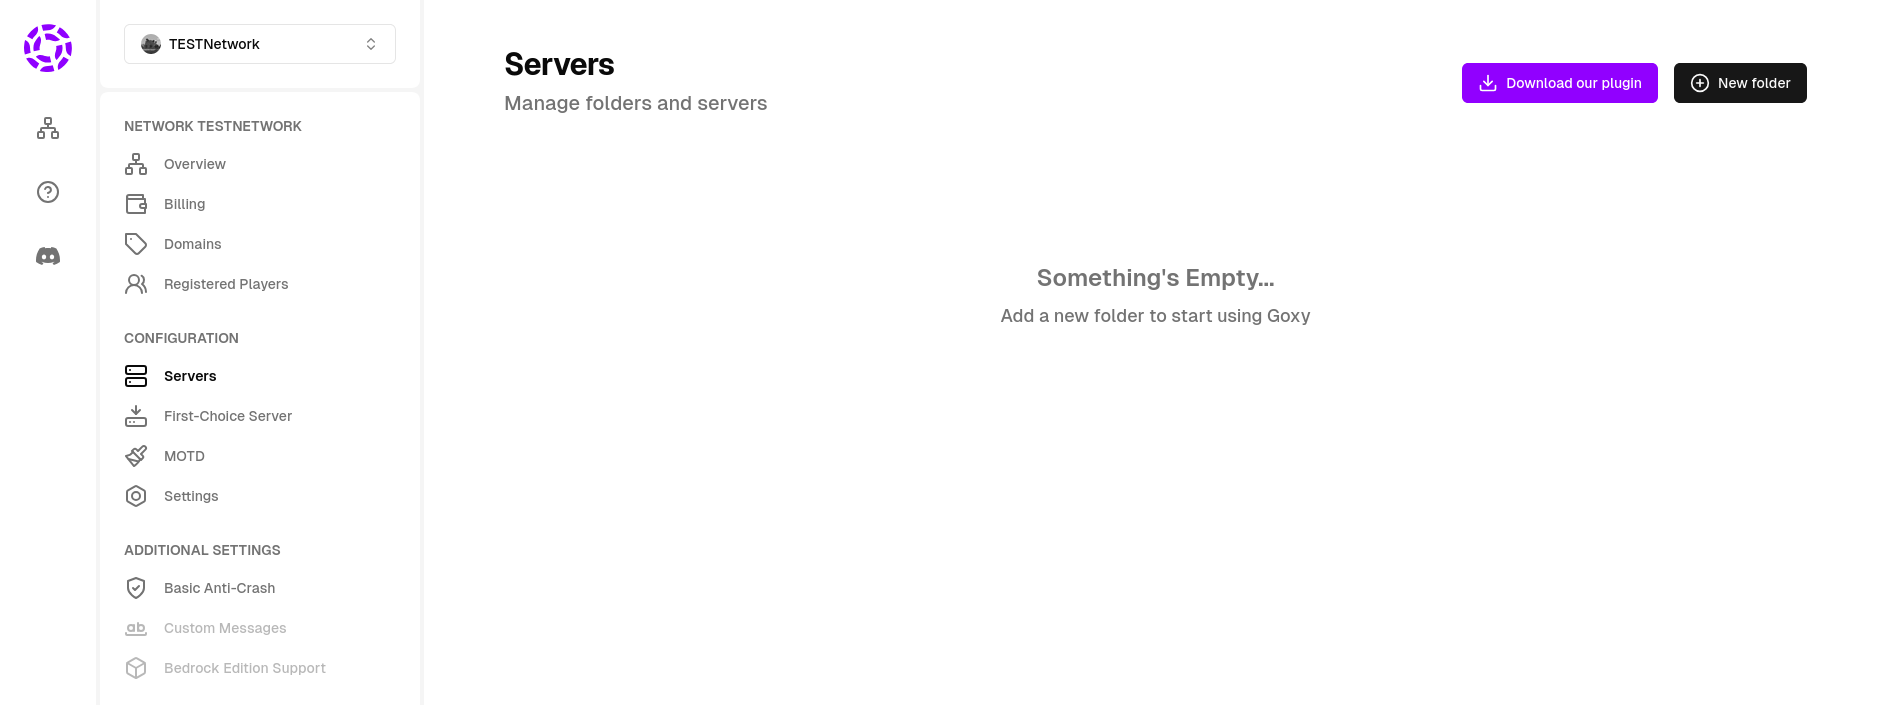
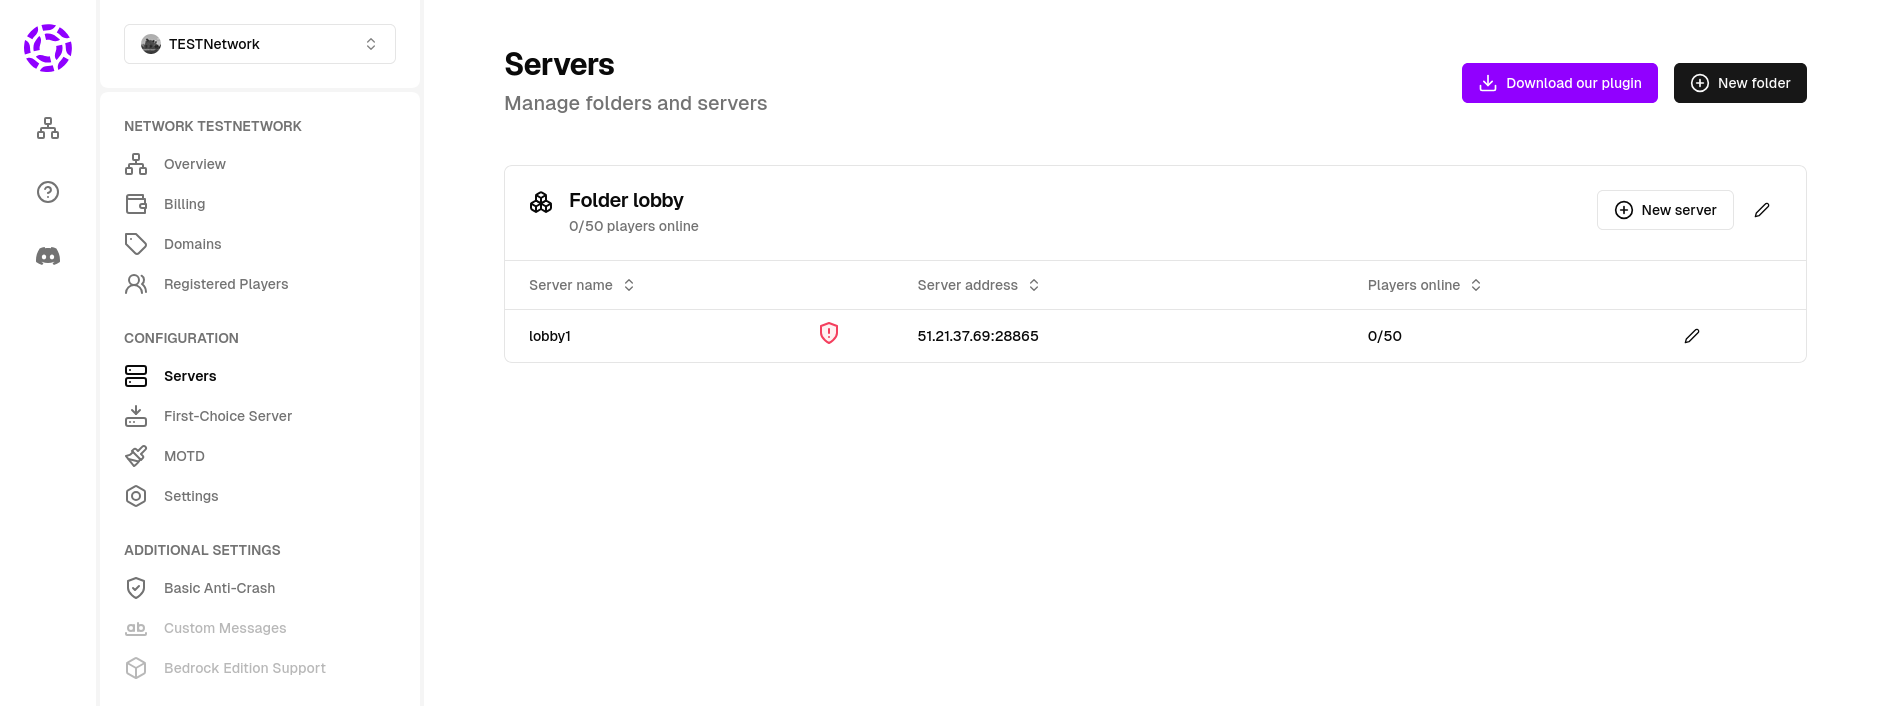
Step 3: Adding a Destination Server
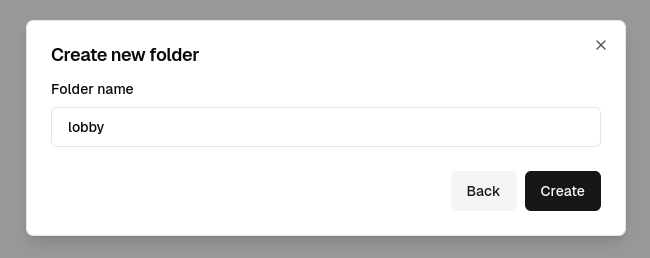
The first step, even before you can create a server, is to create a New Folder. Folders in Goxy allow you to group servers easily. With this solution, for example you will be able to create several lobby servers, and Goxy will balance the load when players enter the server:
- Press the
New Folderbutton in the list of servers.
- Enter the name of the folder.
- Press the
Createbutton.
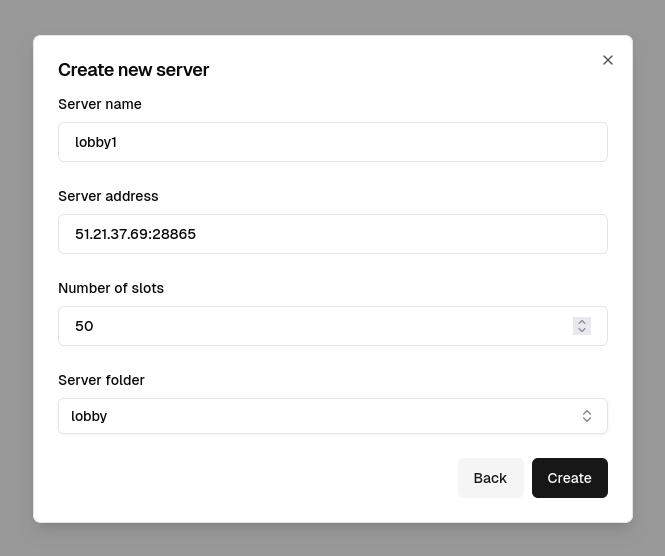
Now you can create your first server:
- Press the
New Serverbutton in the list of servers.
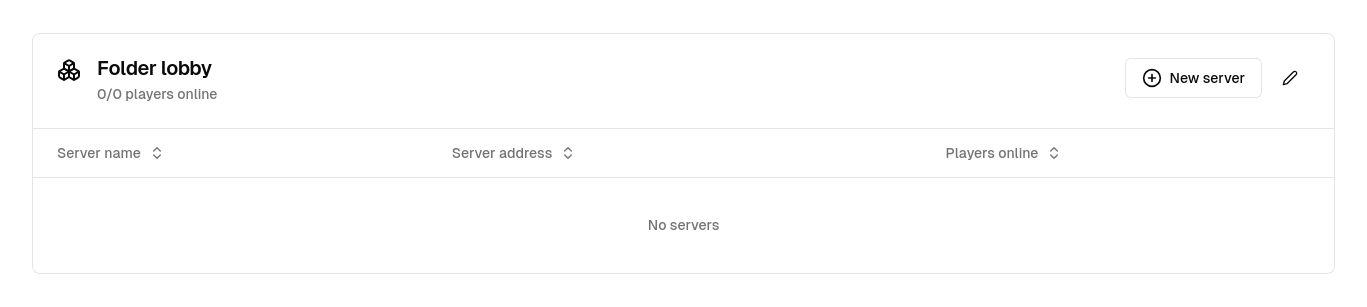
- Complete the server details:
- Server Name
- Server Address
- Number of slots
- Press the
Createbutton.
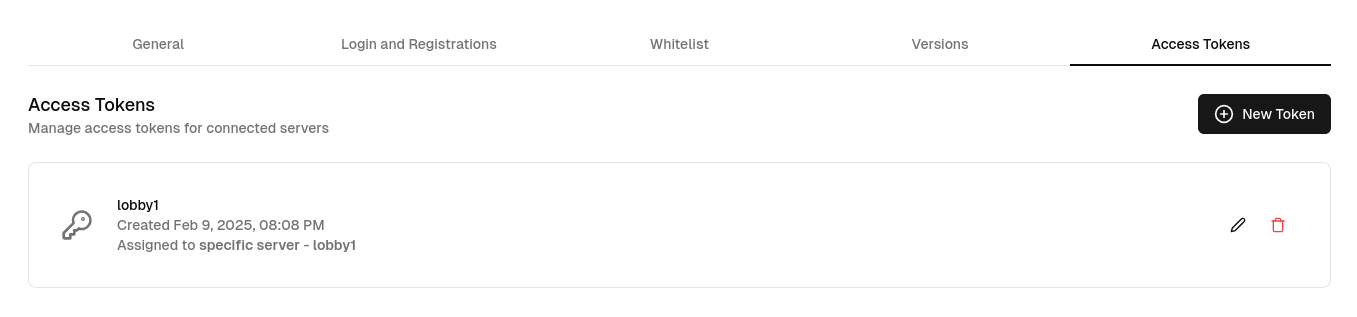
Step 4: Generating the Access Token to the Destination Server
The Access Token can be said to be a unique password to the server. The token allows you to identify a single server. For this reason, each server in Goxy must have its own generated token. Without it, connecting to Goxy servers and entering the server - will not be possible.
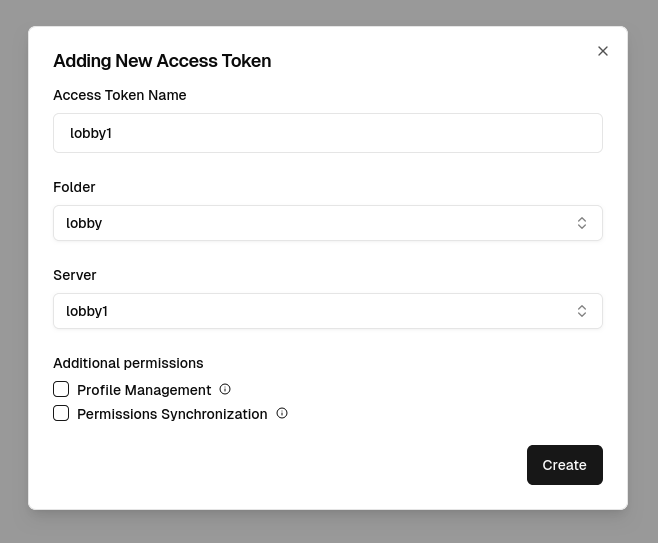
- Press the
New Tokenbutton in the list of network tokens.
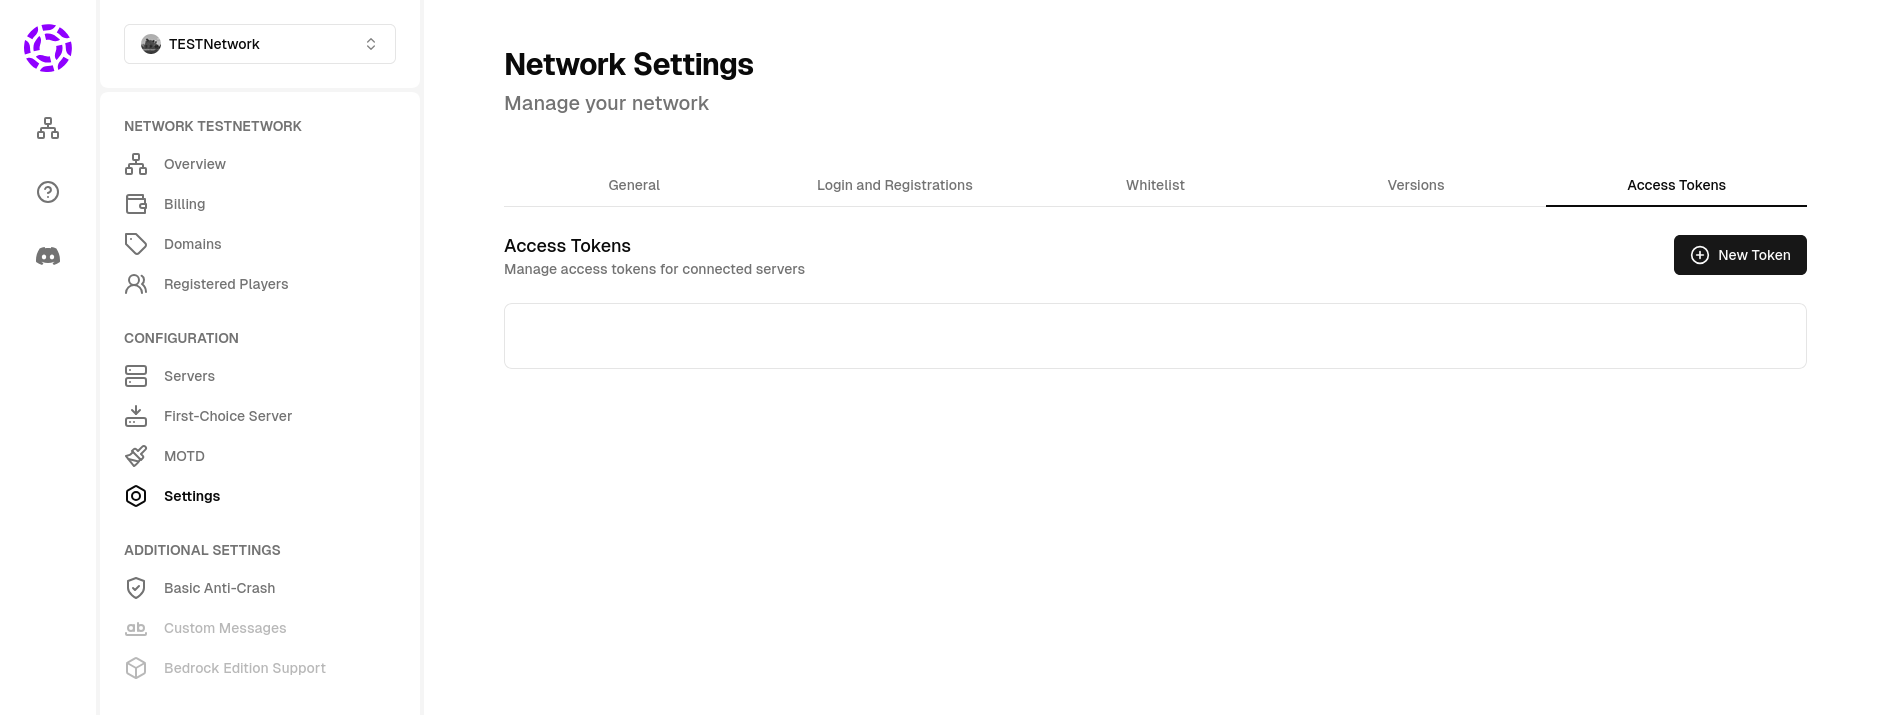
- Complete the token details:
- Token Name - we recommend using the same name as the server name
- Select token folder
- Select token server
- Press the
Createbutton.
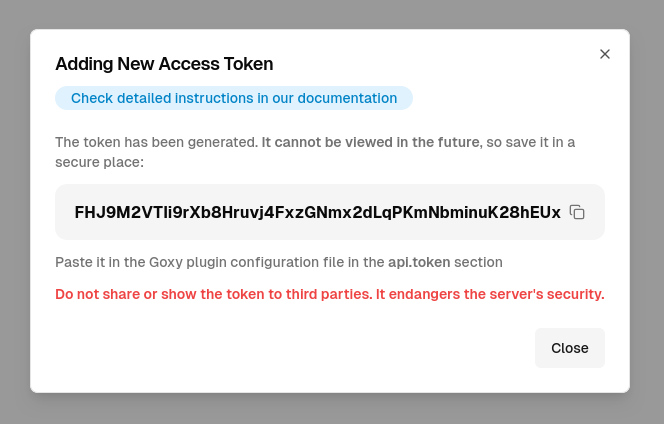
- Copy the generated token. After closing this window, you will not be able to view it again, and you will need it in the next step.
- Make sure the new token appears in the list of all tokens.
Step 5: Minecraft Destination Server Configuration
Goxy works on all major versions of Minecraft servers, starting with engine version 1.8.8. The server must be based on the Spigot engine (if you use another, contact us).
- Turn off the server you will be configuring.
- Download the official Goxy plugin.
If something is not working properly. You can also download it from our Dashboard - by going to the list of servers for the selected network.
- Move the downloaded plugin to the
pluginsfolder, in the root directory of your server. - Start the server to generate the plugin configuration.
- Turn off the server again to avoid overwriting data.
- Open the
config.ymlfile from theplugins/goxyfolder. The contents of the file should look as follows:plugins/goxy/config.ymlapi:
token: "<here paste the key>" - In the token field in the api section, enter the previously generated server access token.
plugins/goxy/config.yml
api:
token: "FHJ9M2VTli9rXb8Hruvj4FxzGNmx2dLqPKmNbminuK28hEUx" - Restart the Minecraft Server. In the server logs you should see the information that the Goxy plugin has successfully connected to our server.
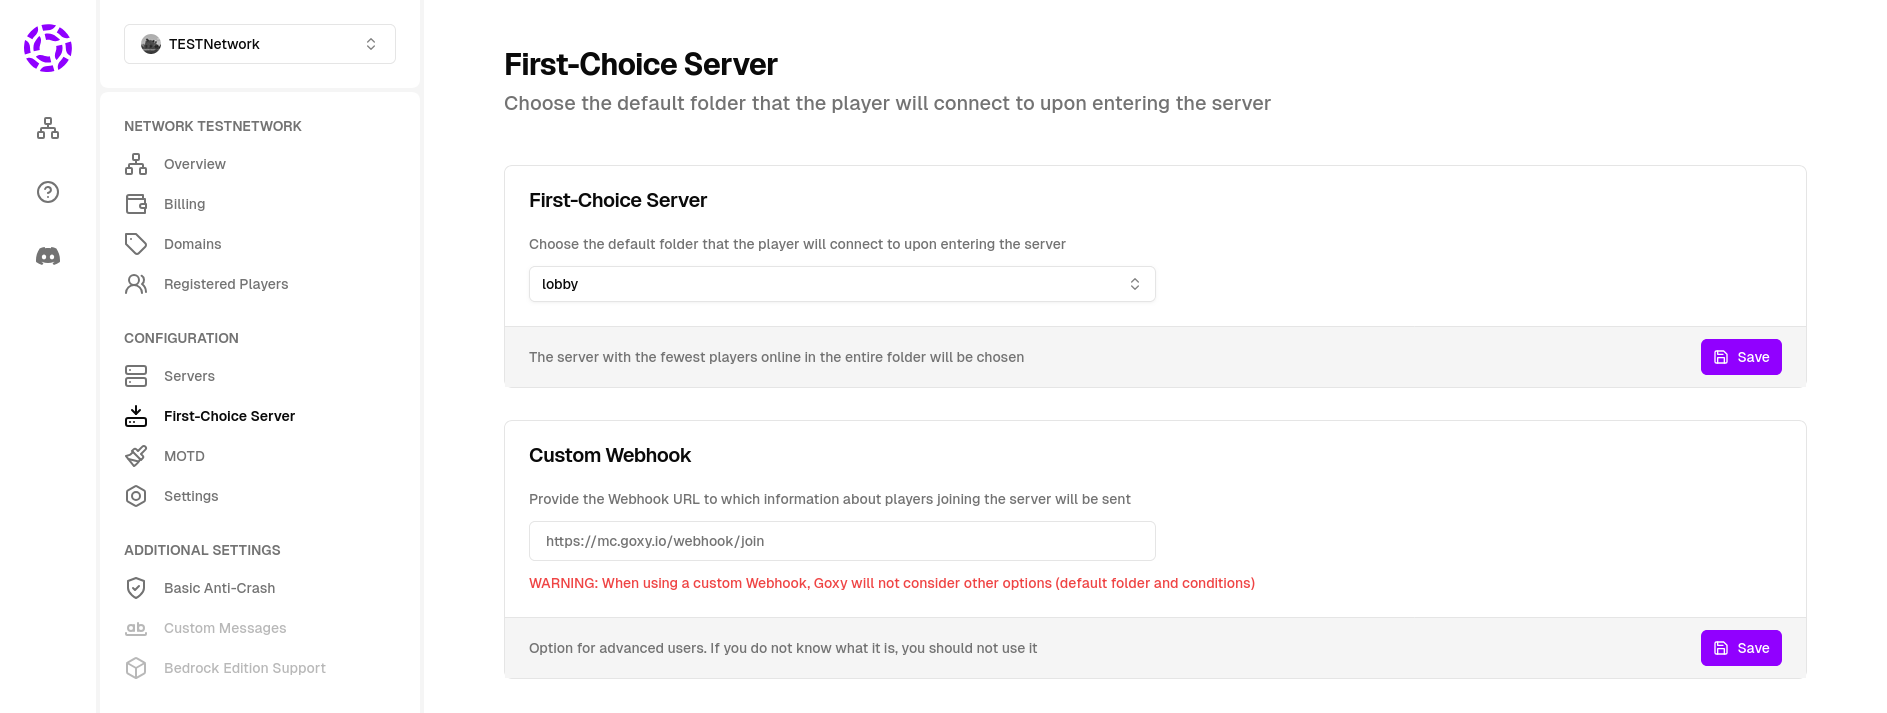
Step 6: Setting up the First-Choice Server
The last step is to select the Folder to which Goxy will direct players as soon as they enter your server. This is necessary for Goxy to know which folder applies to the lobby:
- Go to the
First-Choice Servertab. - Select the Folder you created earlier.
- Click the
Savebutton.
You Managed to pass the Entire Guide
Setting up Goxy is trivial and takes a few minutes.
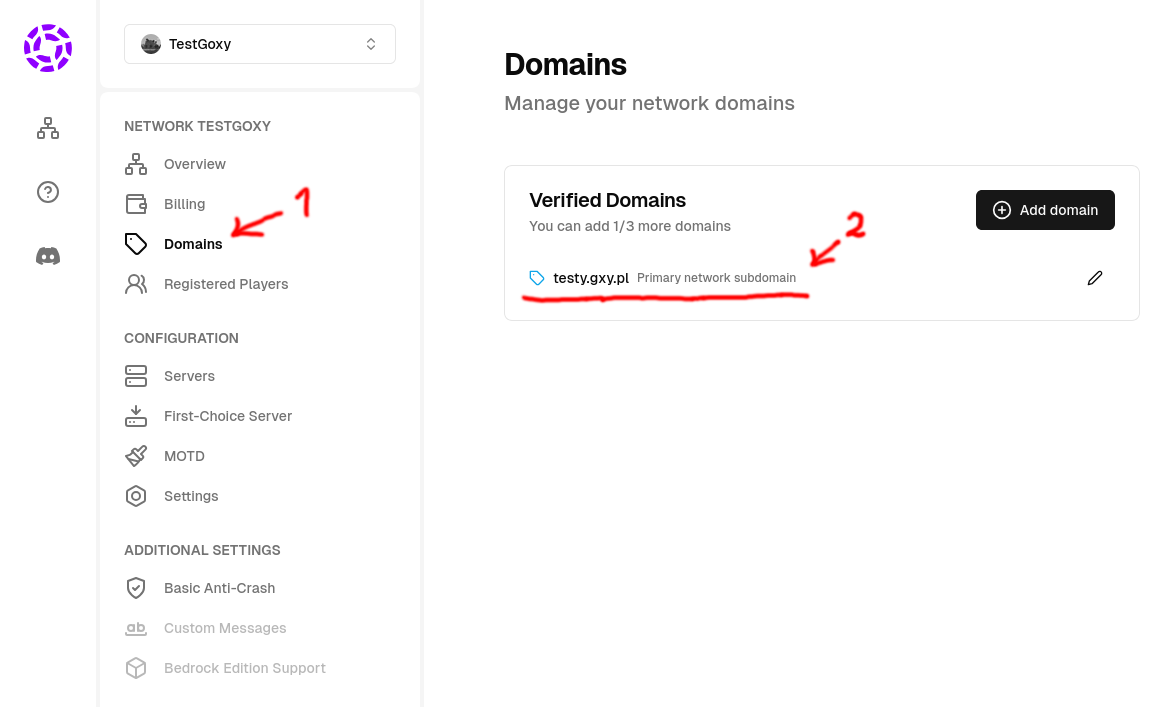
If you've done everything correctly, you should be able to join the server using one of your network's verified domains.
What's next?
Goxy is a powerful tool for Minecraft server administrators, where you have many proprietary solutions and options for customizing the proxy. It is very likely that your next steps will be: