Custom Domain Verification
This step-by-step guide will walk you through verifying a custom domain in the Proxy-as-a-Service dashboard. This allows you to easily add your domain to our Goxy Dashboard and use it in your network. Ready to verify your domain and move on to configuration?
Verify your domain in minutes and get it ready for use in Goxy!
Before You Begin
Make sure this guide applies to you. Before adding a custom domain, you must purchase it first. If you don't have a domain yet, you can buy one, for example, on OVHcloud.
This guide is based on the Cloudflare Dashboard. If you use a different DNS or domain provider, the steps may vary slightly. However, adding DNS records is usually very similar across most management panels.
Coming soon.
Steps
Step 1: Go to the Domains Tab for Your Network
After navigating to this tab, you should see a view like this:
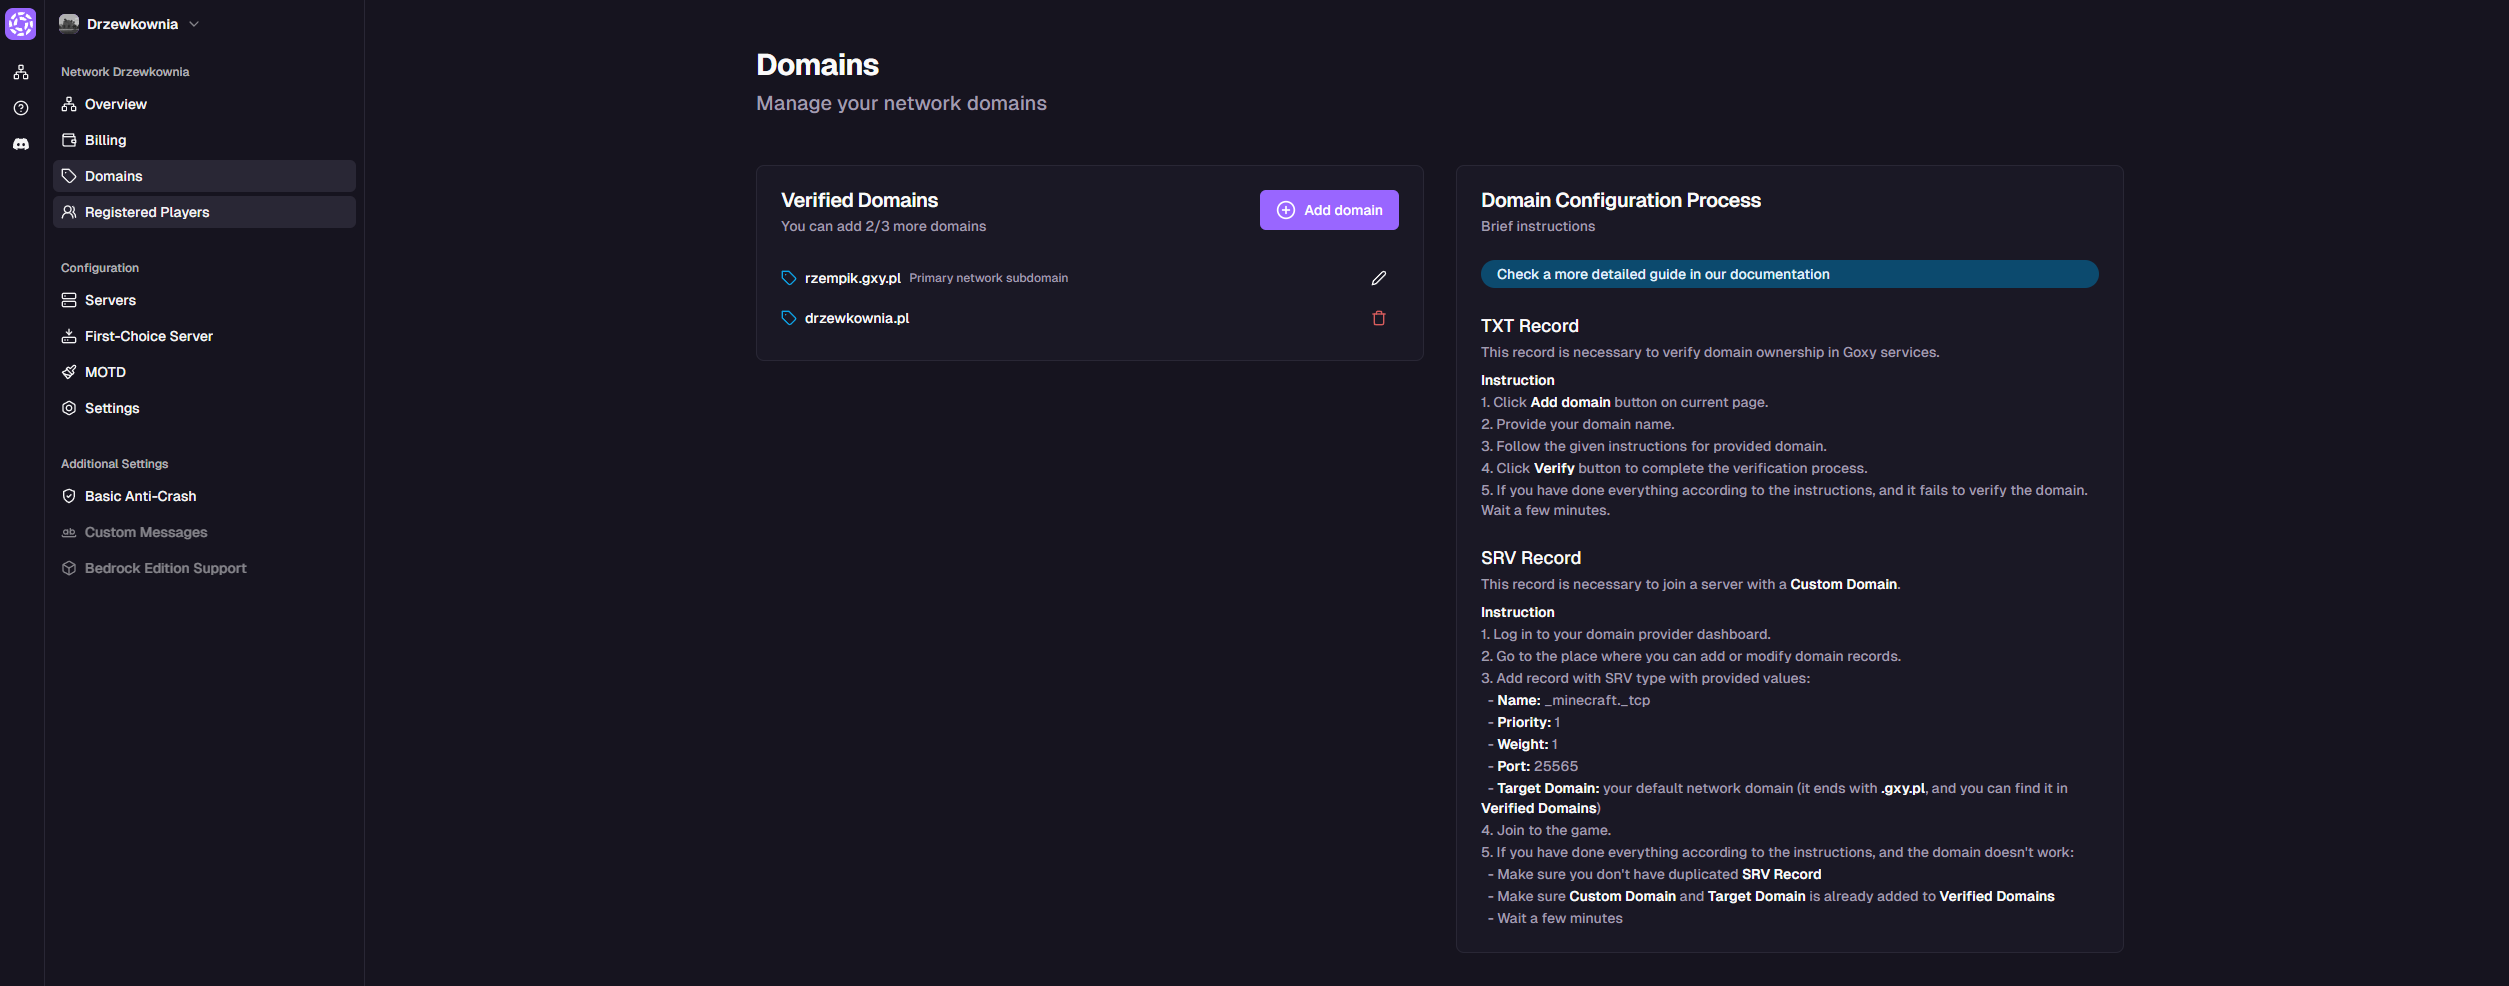
Step 2: Add a New Domain to the Network
- Click the
Add Domainbutton.
- Click the
Nextbutton. - To assign the domain to your network, we first need to verify ownership. You'll be asked to add a TXT record with a generated verification key for the domain you entered.
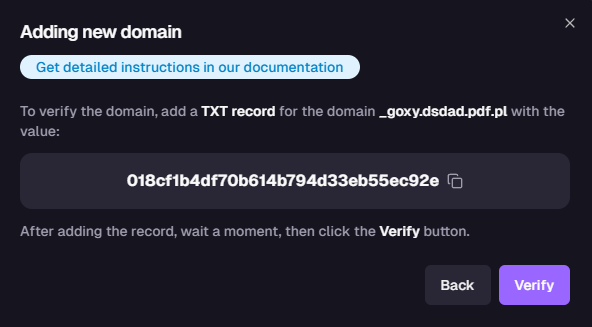
- Copy the provided verification key.
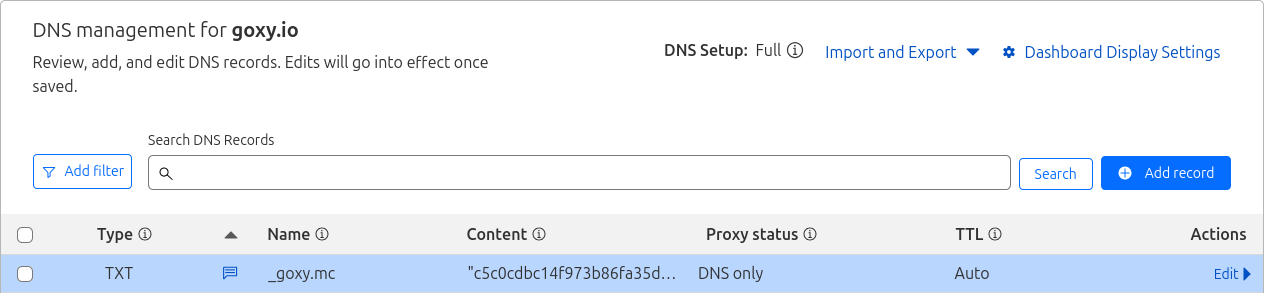
Step 3: Add a TXT Record to Your Domain
To complete this step correctly, check where you purchased your domain - you can usually configure it in your domain provider's dashboard. If you've delegated DNS, do this in your DNS provider's panel (most often Cloudflare).
Once you're in the DNS management section:
- Go to your domain list.
- Select the domain you entered earlier.
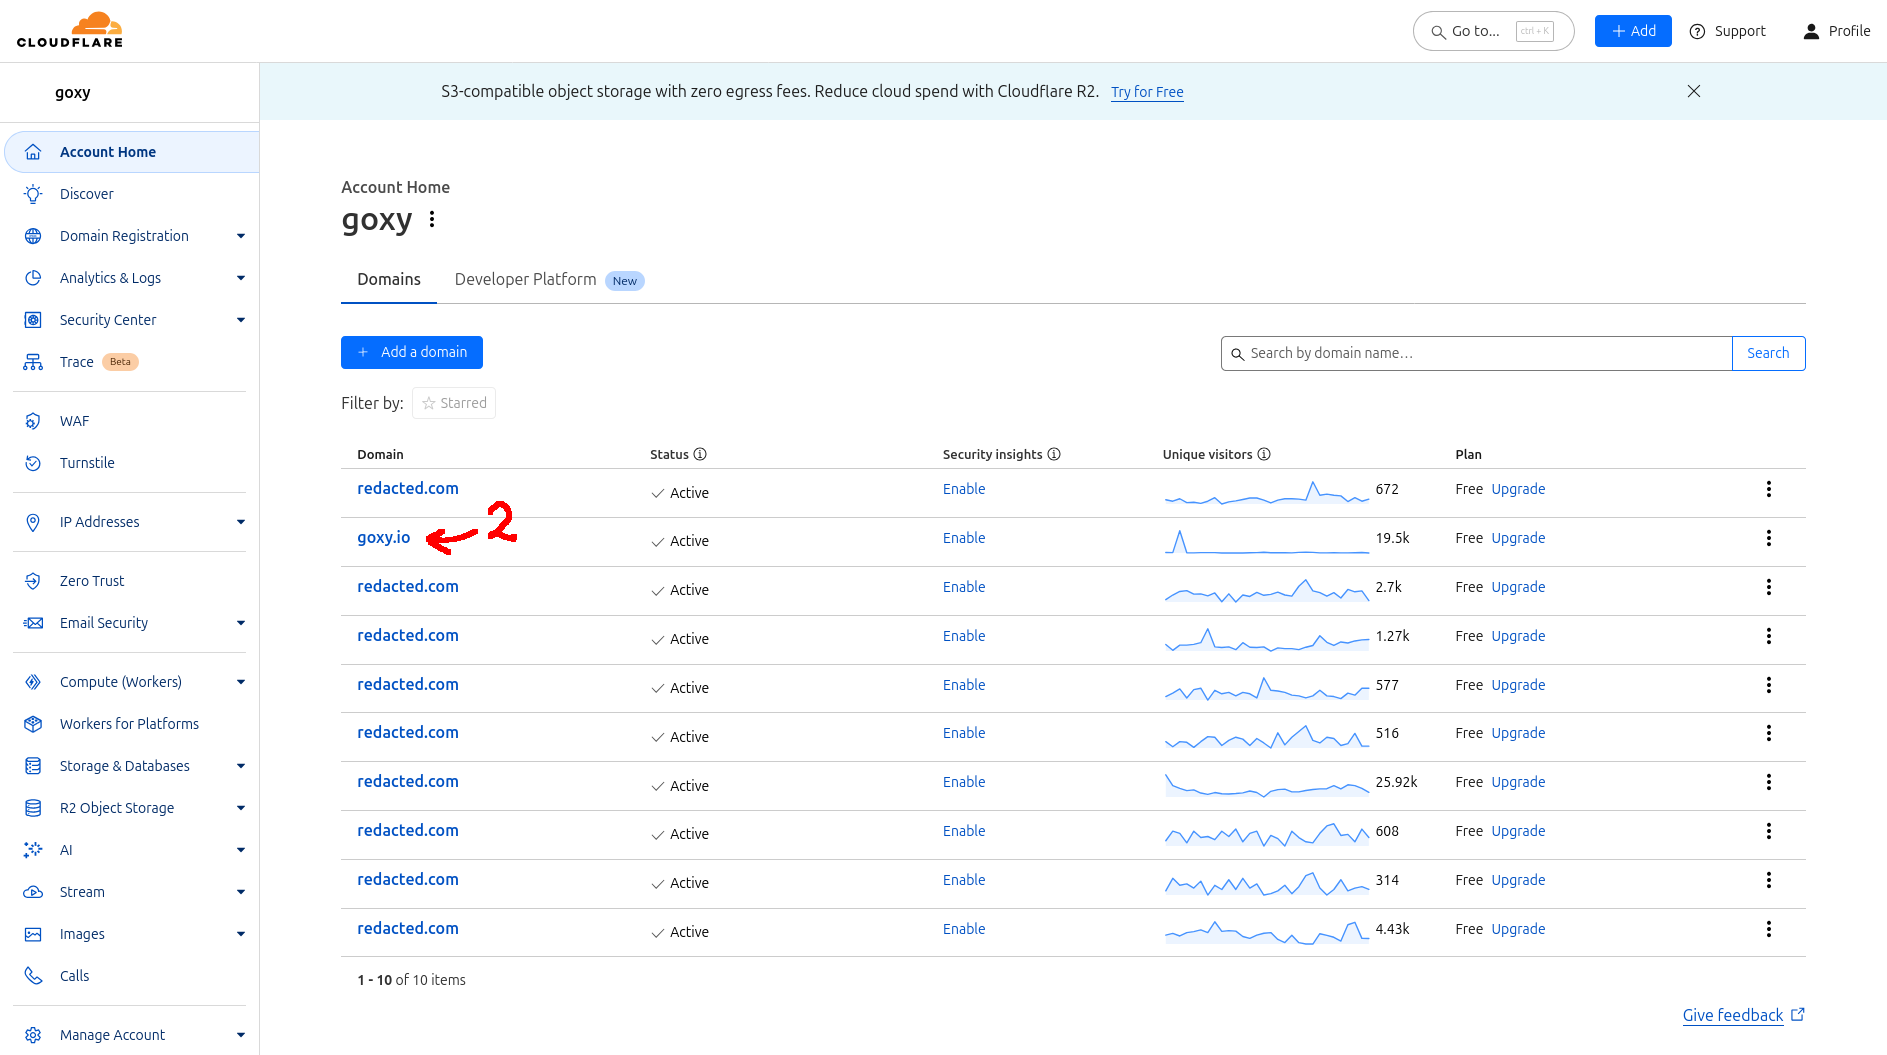
- Go to the DNS Records tab.
- Click
Add Record. - Select record type:
TXT. - In the Name field, enter:
_goxy. - Paste the copied verification key into the Content field.
- Click
Save.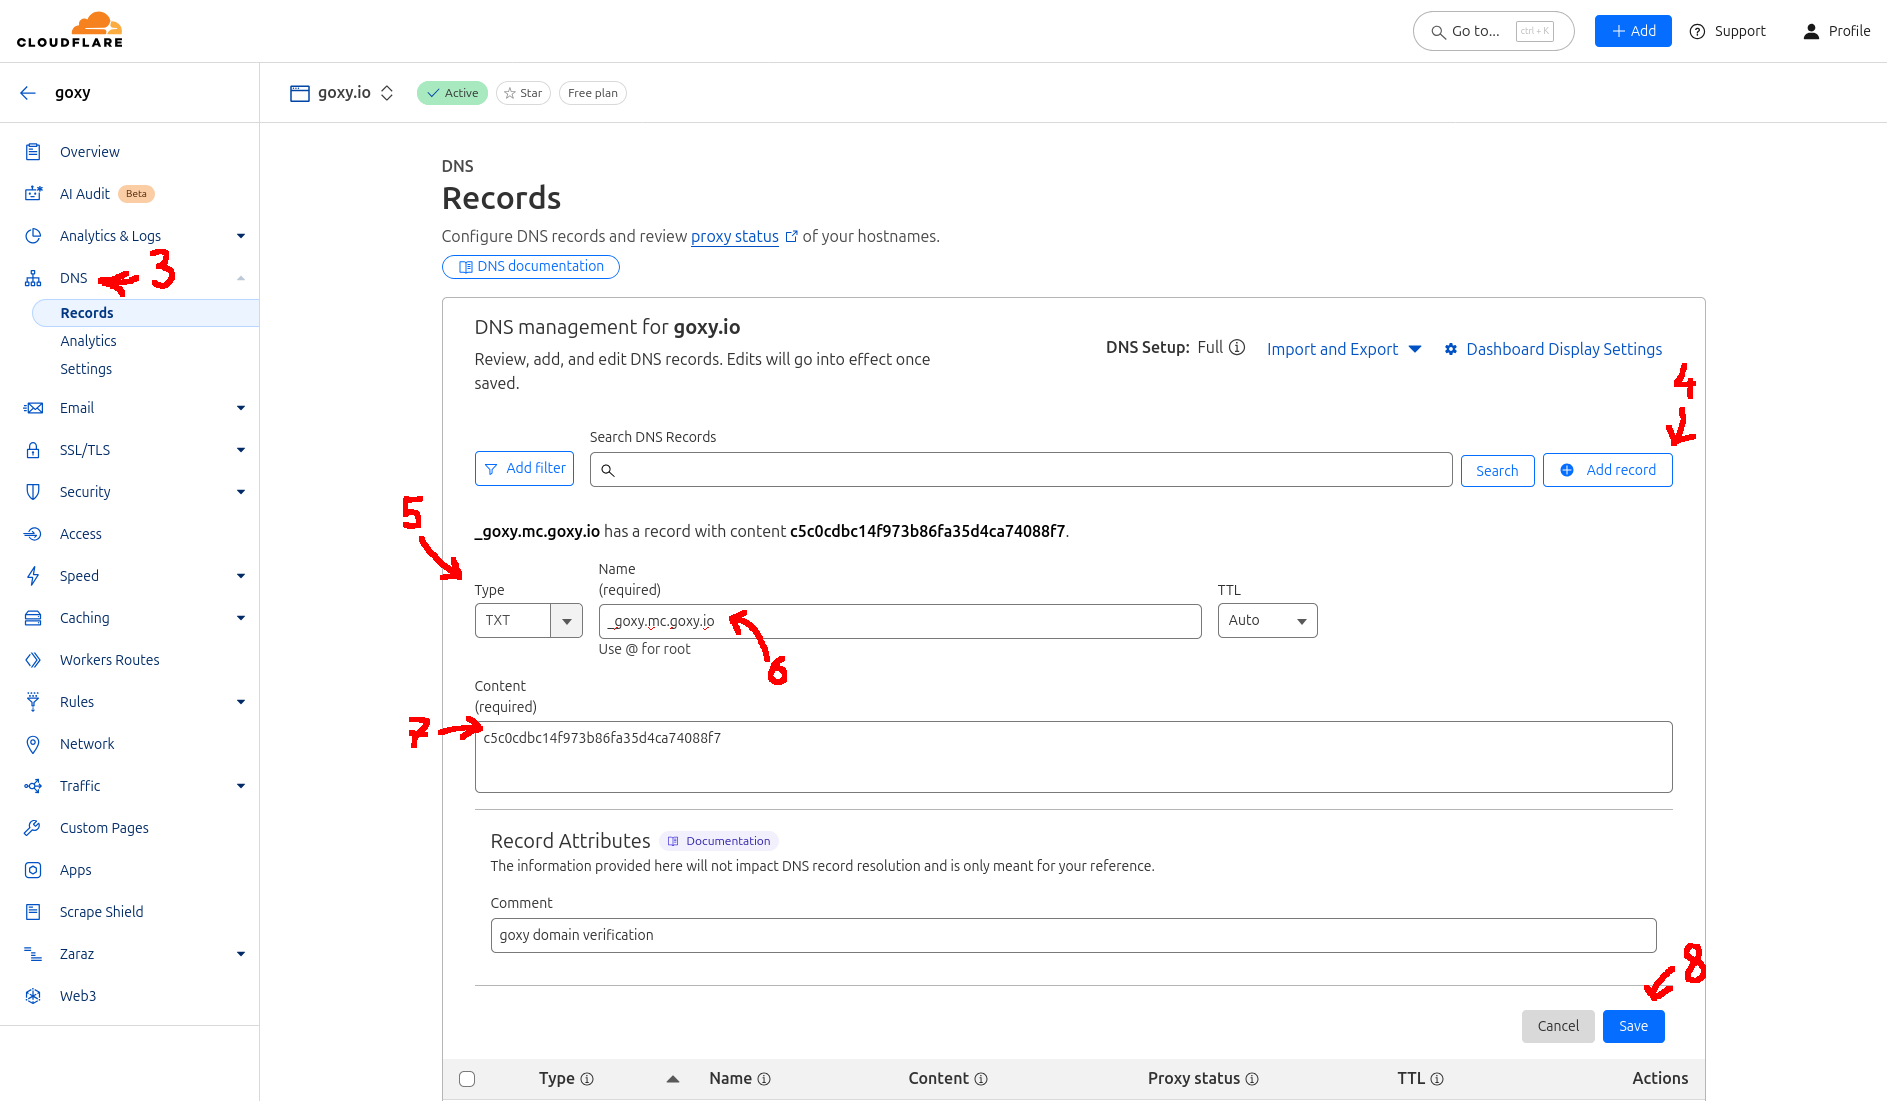
- Confirm the record was added correctly.
Step 4: Complete Domain Verification in Goxy Dashboard
- Click the
Verifybutton. - If verification fails after adding the TXT record, DNS servers may not have refreshed yet. Wait longer - this can take up to 24 hours, though it usually works within an hour.
- If successful, your domain will appear in the Verified Domains list.
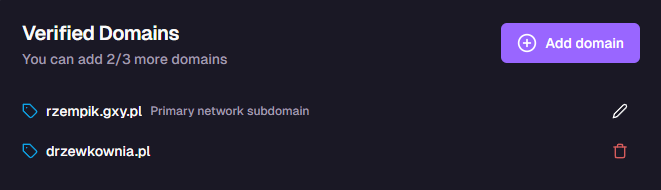
DNS server refresh can take up to 24 hours. If verification doesn't work immediately, try again after a few hours.
🔒 Security
Domain verification ensures only you can use your domain in Goxy.
🌐 Professional Address
Start with verification to use your own domain in your network.
⚡ Speed
Add a TXT record and verify your domain in minutes.
Your domain is ready to use! Proceed to domain configuration or check the API documentation for advanced options.
Links
Contact us!
We respond to all messages within 24 hours on Discord.
🎉 Verify Your Domain & Build Your Network!
Join Goxy and give your network a professional identity!
REGISTER FOR FREE